Model C4040
Size: W 12 x L 12 x H 4.5 m
Maximum wind load is 80 km/h
Maximum snow load is 0.28 kPa
LIST OF PARTS
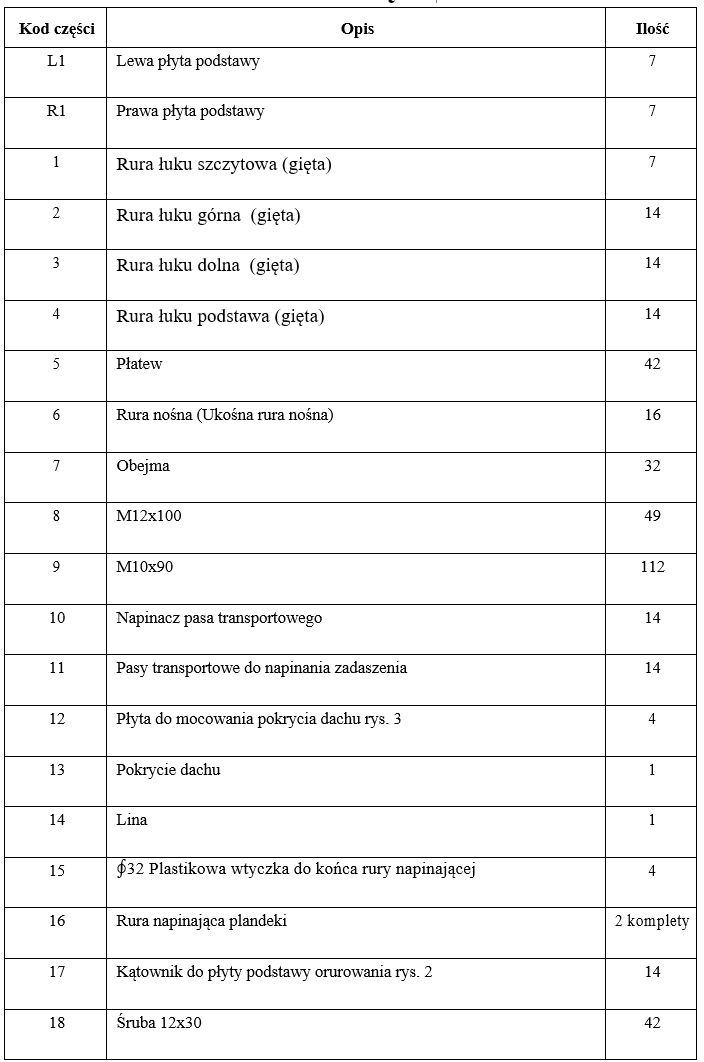
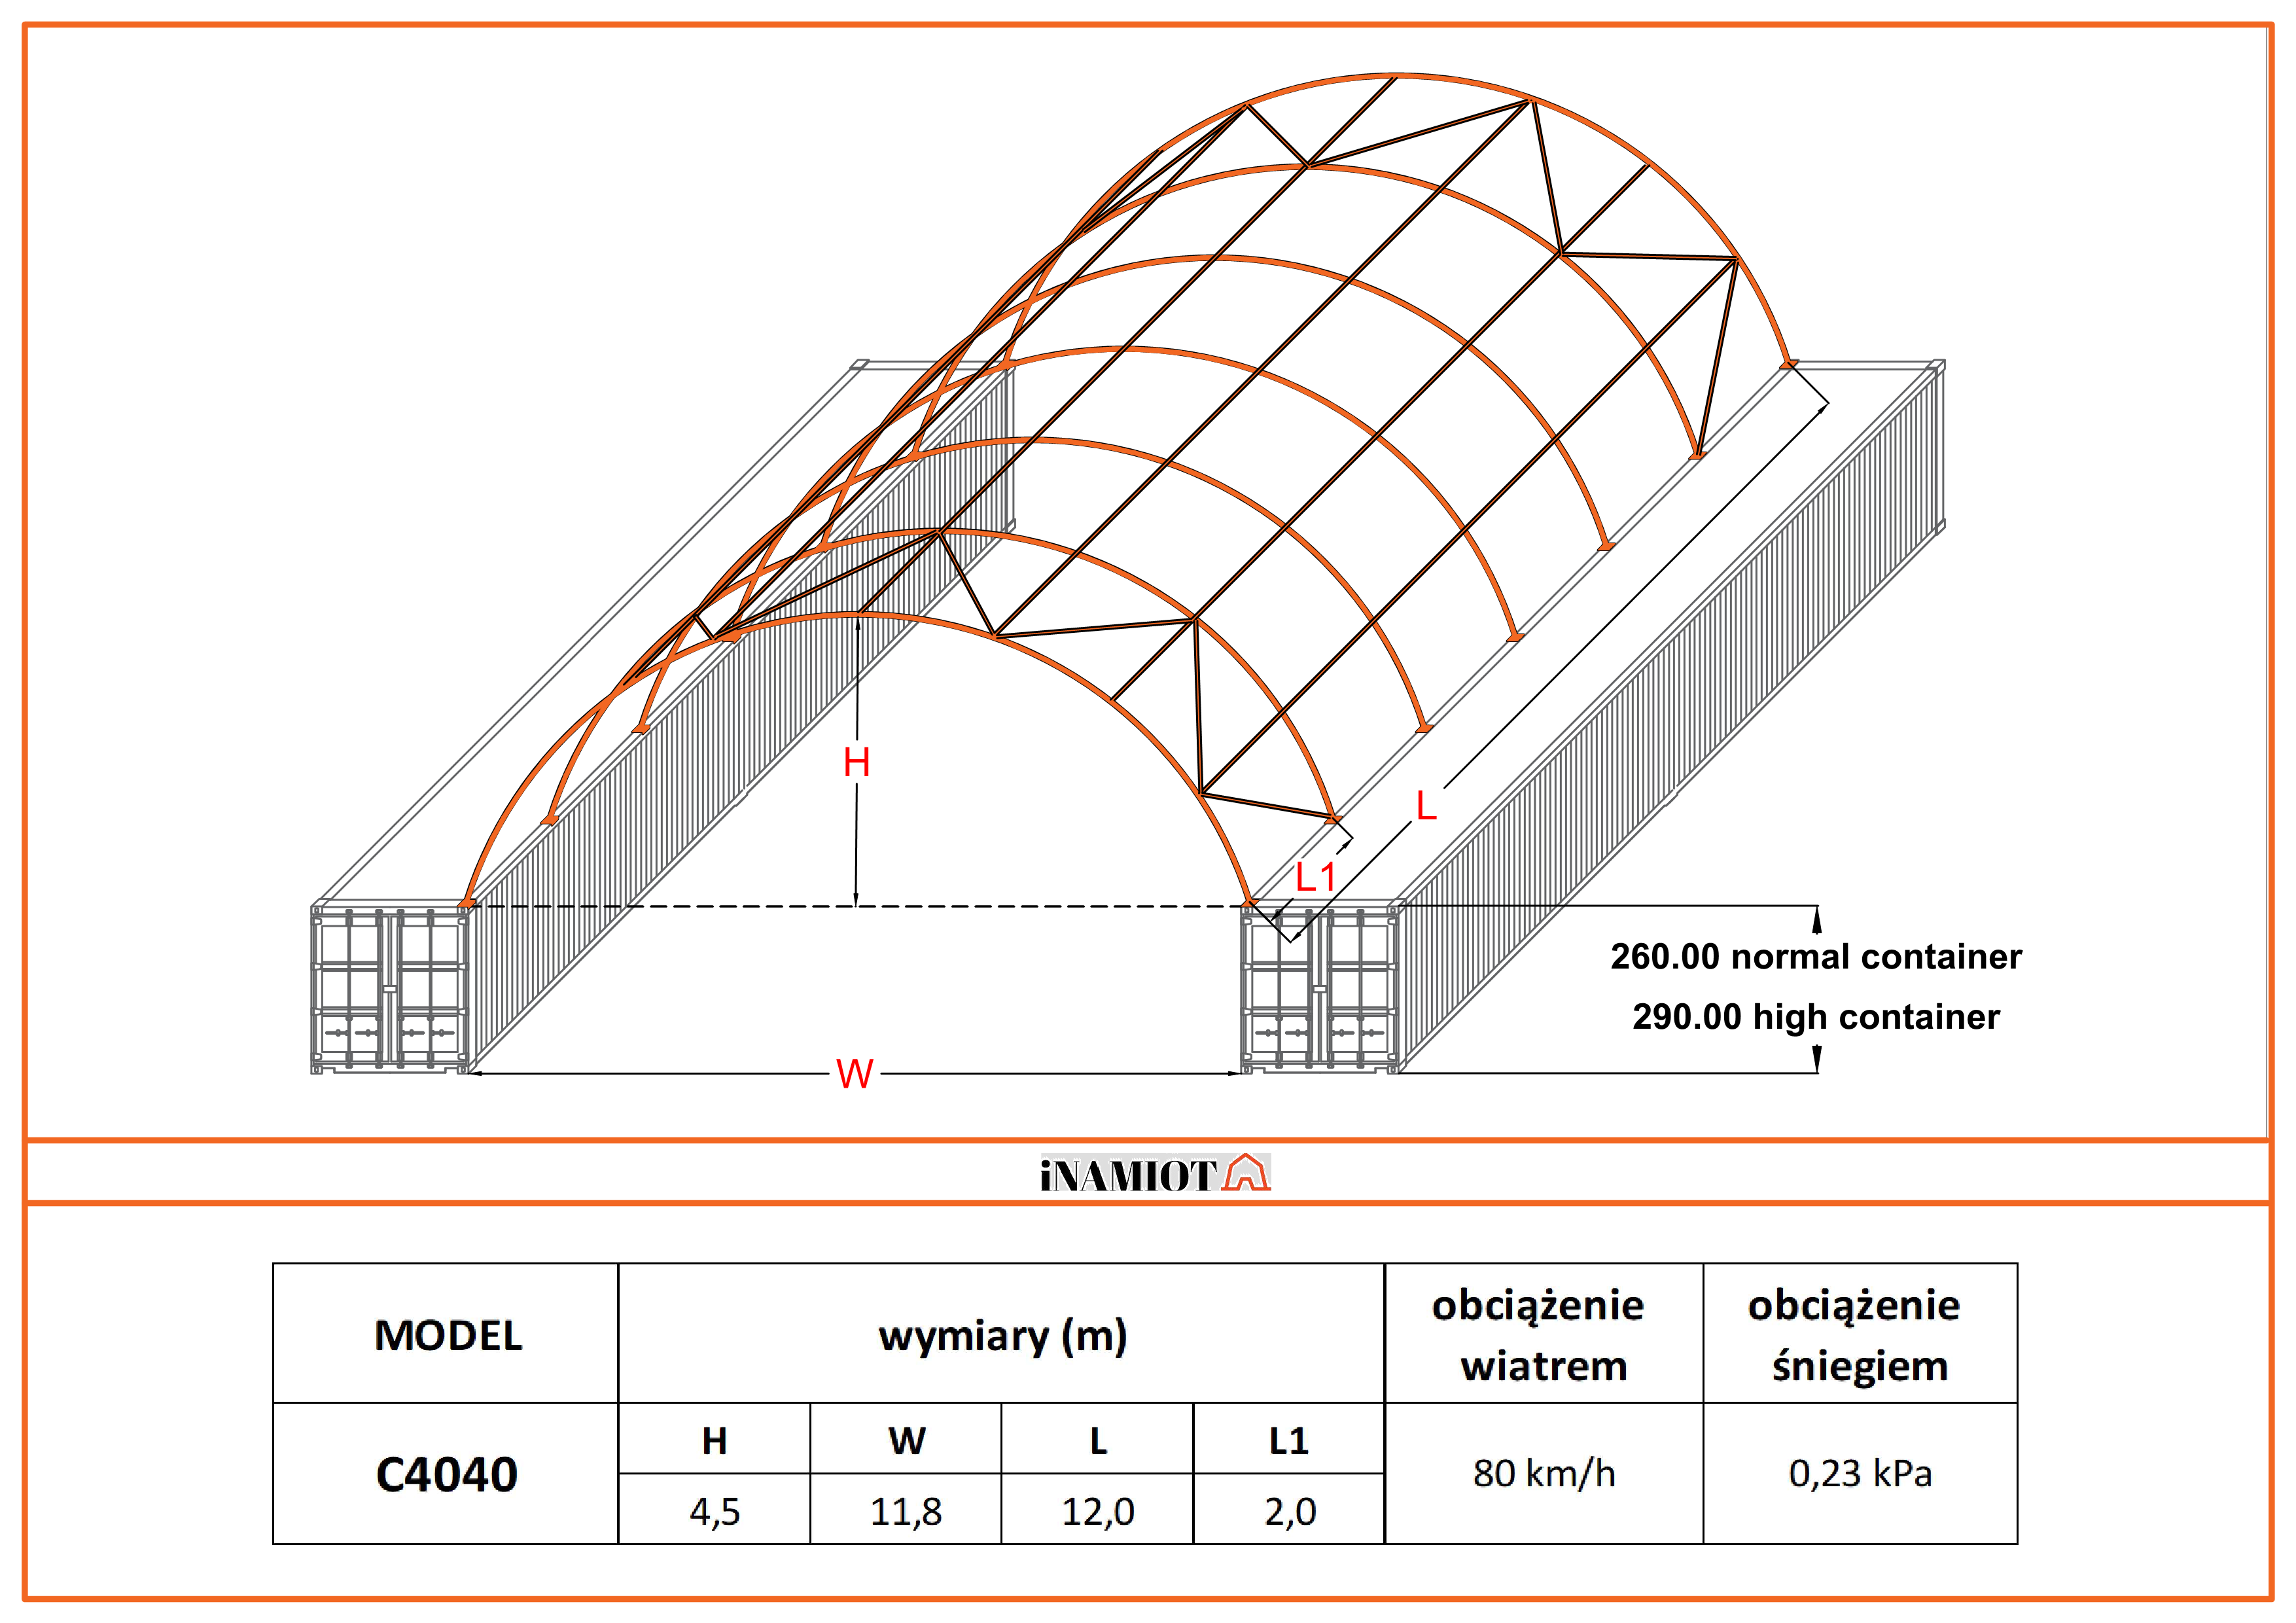
Fig. 1 Dimensions of container roof structure
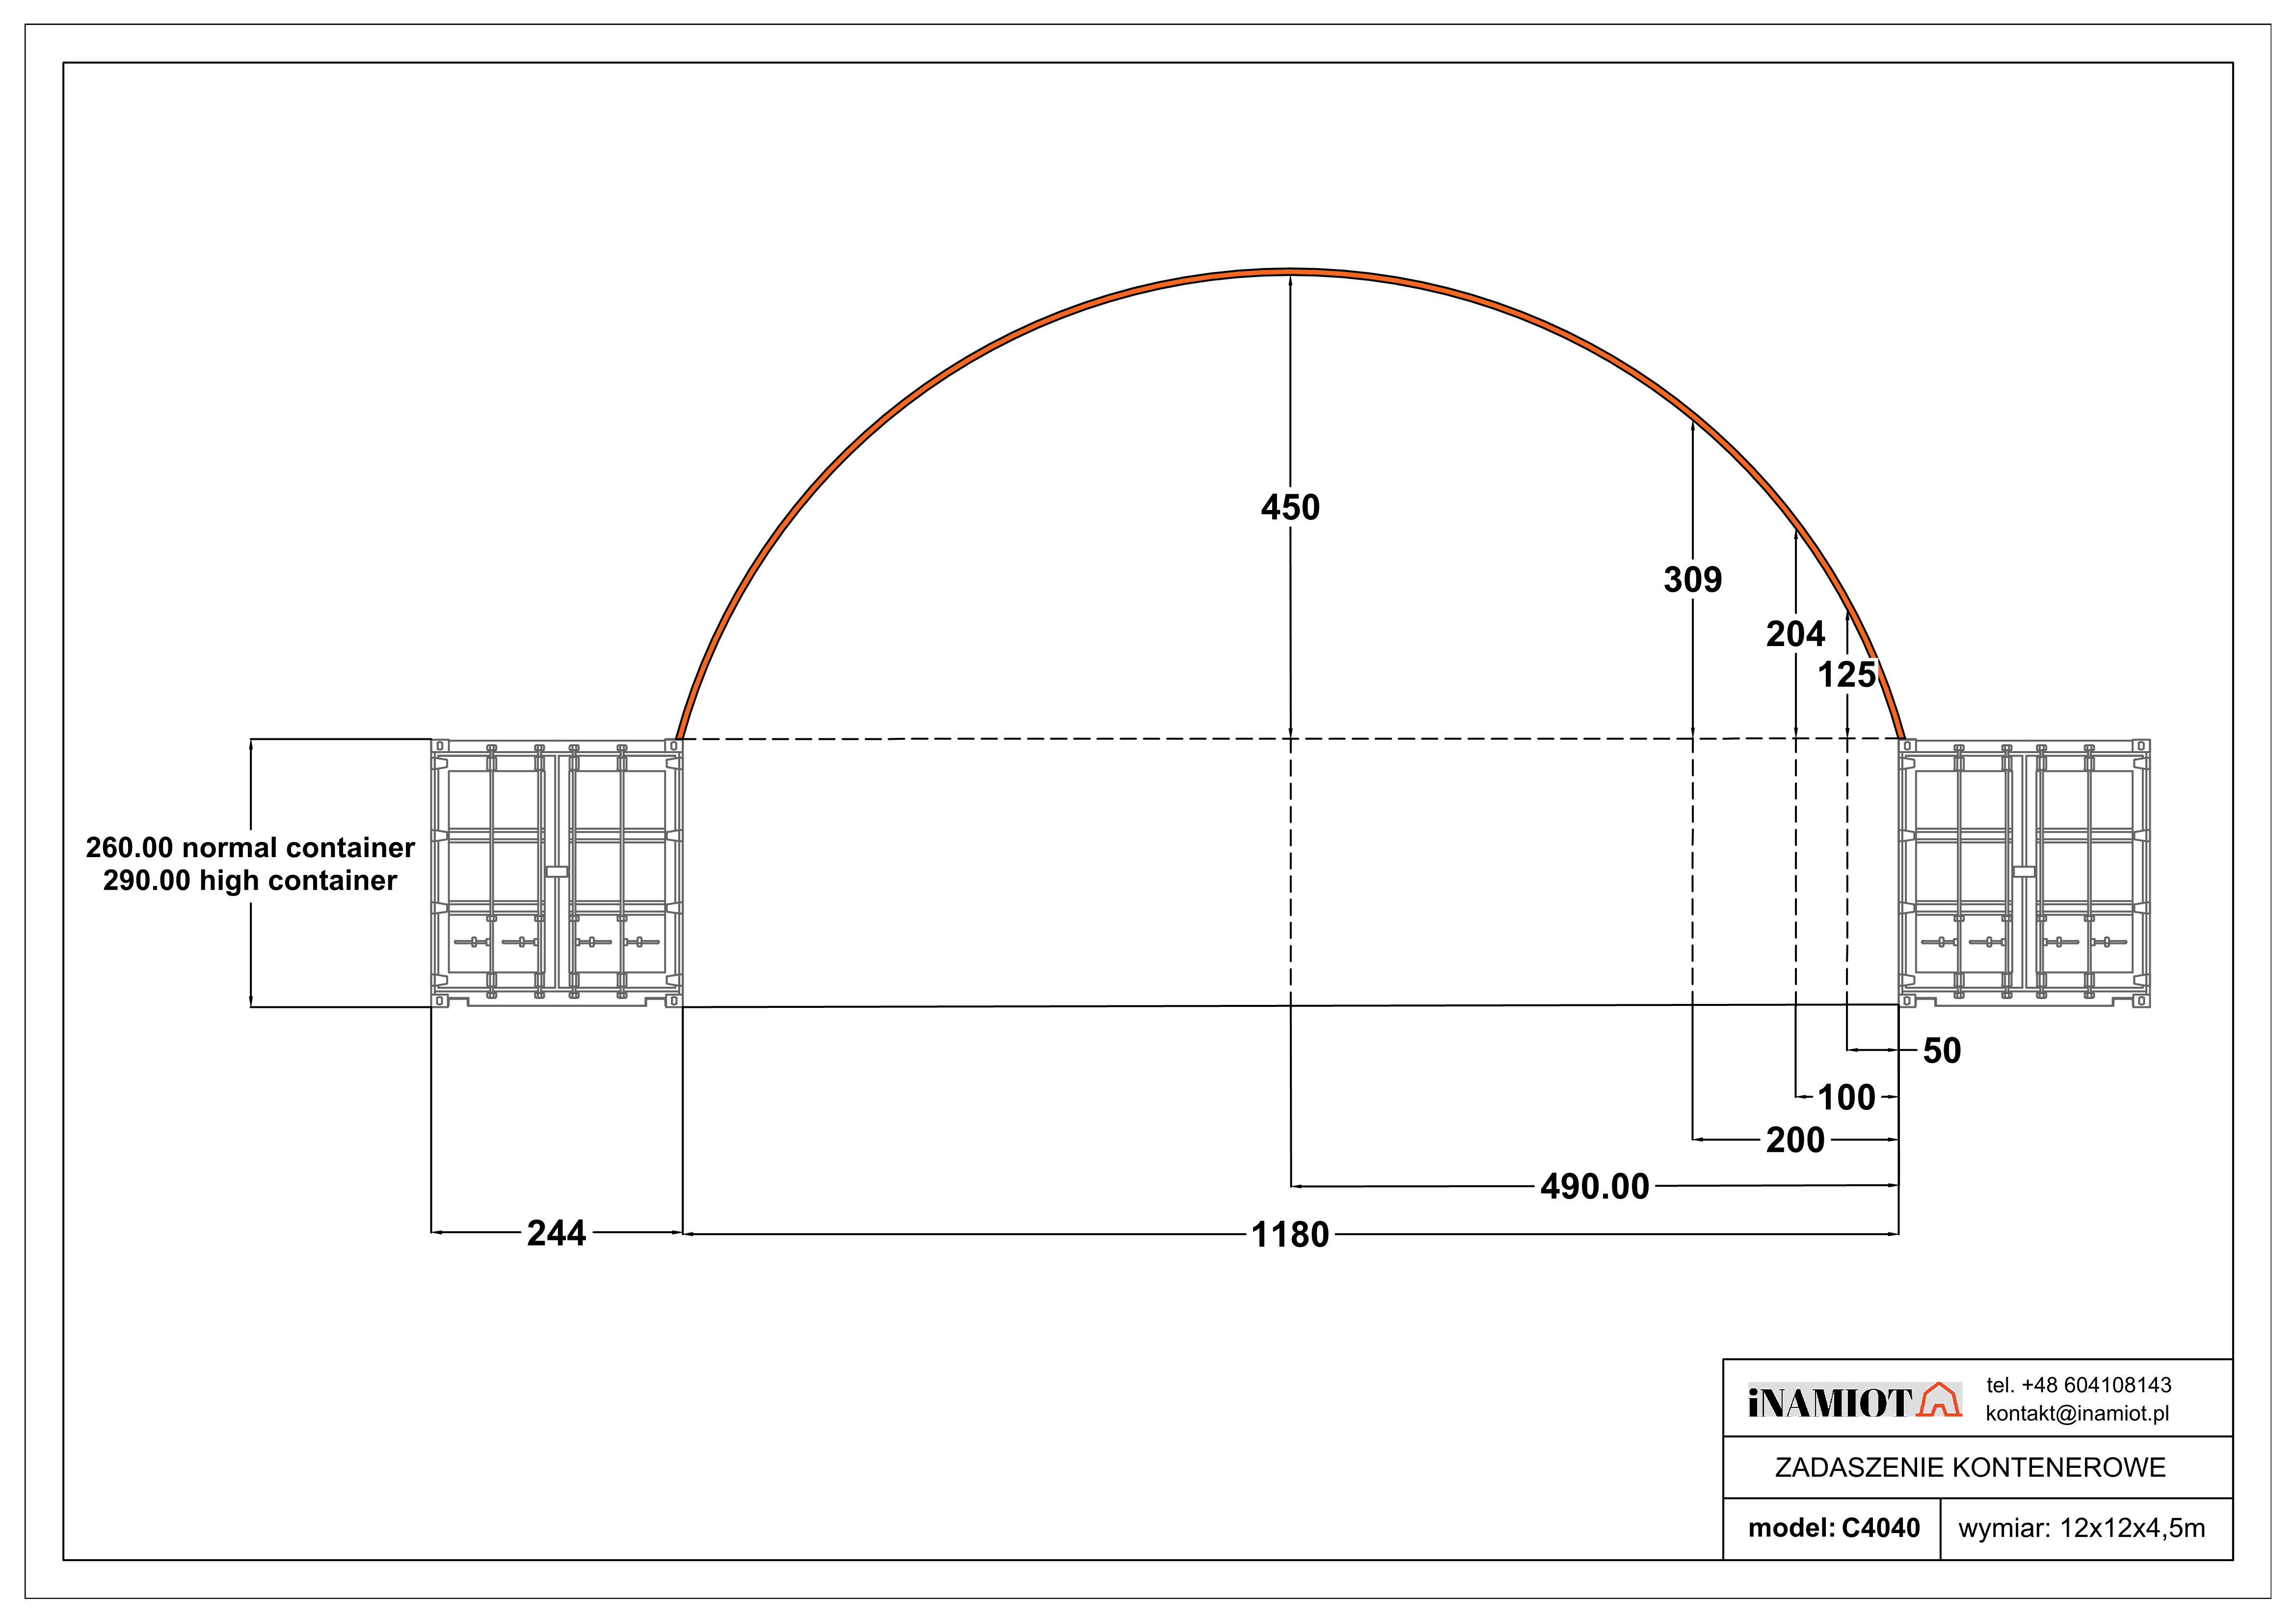
Fig. 2 Structure dimensions of container roof - front view
IMPORTANT----- FIRST READ THE INSTRUCTIONS
Improper site preparation, assembly and maintenance can invalidate the warranty and result in an unnecessary and costly error.
For easy assembly, we have identified each individual component with the part code indicated in the parts list. Familiarise yourself with the part code numbers and drawing to ensure trouble-free assembly.
If road salt or other highly oxidising substances are to be stored under the canopy, they must be stored in sealed big bags or under cover.
READ INSTRUCTIONS WITH UNDERSTANDING BEFORE INSTALLATION,
IF YOU HAVE DIFFICULTIES CALL +48604108143
or send an e-mail: kontakt@inamiot.pl
Very helpful video on the installation of a container roof:
|
- Check the contents of the consignment after opening the transport box. Ensure that all components of the container canopy are in the crate.
- Do not set up the container roof in high winds, in wet areas or on unstable ground. Check the weather forecast.
- Check local regulations and plan the location of the canopy so that the required distance from electrical cables, gas pipes, water pipes etc. is maintained.
- If the canopy is based on shipping containers, they should be level, positioned according to instructions, i.e. parallel, and if they are not fixed to the ground, they should be loaded according to the regulations for the area in which the canopy is to be erected.
- Pay attention to the direction of the bolt. Do not install the bolts on top of the structural frame of the tent where the material will rest, as you will damage the material.
- Cover all pipe and bolt connections with repair tape (silver tape) to protect the canopy.
- Work in accordance with health and safety requirements. Be careful not to cut your fingers with clamps and tubes during assembly. Install with protective gloves, work boots, etc.
- Ensure that you have access to the containers from all sides during assembly, so that you can manoeuvre with a forklift, telescopic loader, hoist etc.
- All operations should be carried out by professionally qualified persons.
- Keep the work area clean.
- Do not use sharp tools in contact with the tarpaulin.
- If you are fitting a tarpaulin in winter, the tarpaulin itself must be stored in a room with a minimum temperature of + 10 C or higher for 2 days before fitting . Otherwise the tarpaulin must be stored in a room with a minimum temperature of + 10 C or higher and spread at this temperature. Otherwise, kinks or cracks may appear in the tarpaulin.
- The canopy should only be assembled from the supplied components. It is not permitted to modify, alter etc. the elements of the container roof. The elements of the container roof must not be modified, altered etc. Any changes to the elements, substitutions of elements will void the guarantee.
- No additional loads may be attached to the tent structure. The structure is only rated for snow load, wind load and its own weight.
TOOLS REQUIRED FOR INSTALLATION
1. Measurement tape
2. Repair tape (silver tape)
3. Chalk(marker)
4. Level
5. Screw spanners
6. Stepladder
7. Hammer
8. Knife, scissors
9.Welder (in a welded version for the container)
10. hammer drill (concrete block version)
INSTALLATION PROCESS
The containers on which the canopy is deployed should be fixed to the ground!!! If this is not possible, load the containers so that a gust of wind does not cause them to move, as this risks damaging the structure of the canopy.
INSTALLATION OF BASE PLATES
1. Please refer to the diagram (Figure 1) to position the base plates. The measure, is given from the centre to the centre of the tubes. Referring to the diagram above and confirming the location of the base plates. MAKE SURE that the base plates are welded parallel to each other and at right angles to the opposite base plates.
All base plates require the use of a welder and a qualified welder to weld the base plates onto the containers
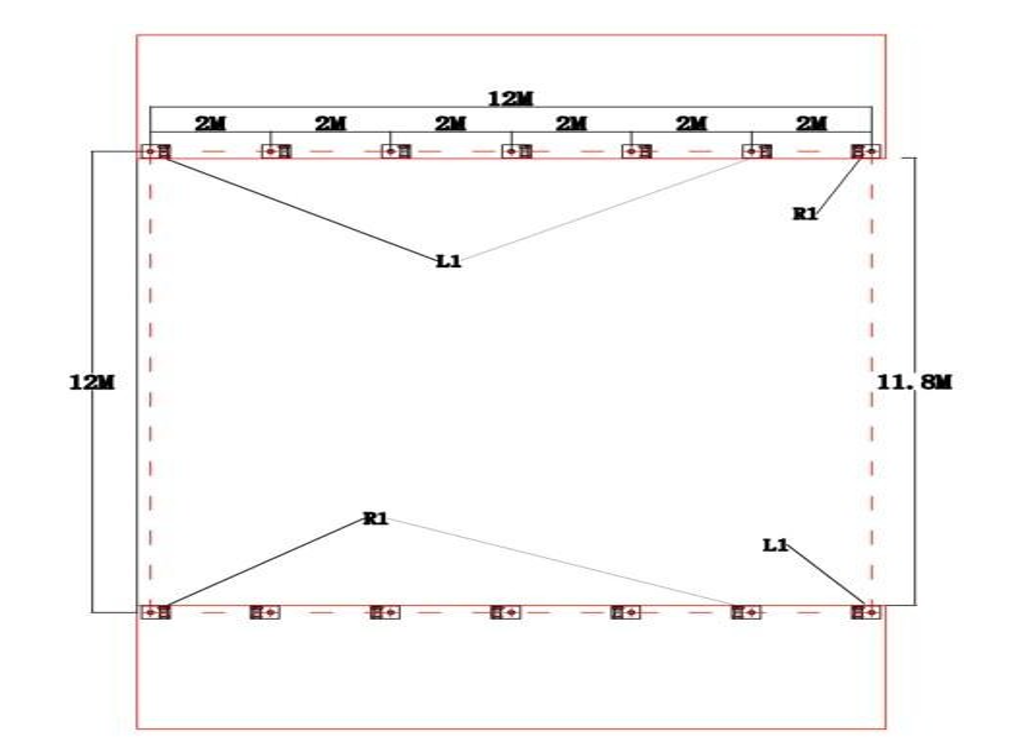
Fig. 3 Assembling the base plates
FRAME INSTALLATION
- As shown in Figure 4, locate the top bent tube (part code 1), centre bent tube (part code2), side wall arch tubes (part code 3) base arch tubes (part code 4). To connect them using M10x80 (part code 9) to form one group of arches. Note the direction of the screw. DO NOT install the bolts on top of the truss where the material will rest, as you will damage the material.
- Place the assembled arch into one base plate and push the other end of the arch into the opposite base plate.
- Completing the assembly of the first two arches, connect the connection purlins to them using M12x100 (part code 8). There are 7 pieces of connection purlins (part code 5) between the two arches. Then install the third arch in the base plate and screw the purlins together.
- Finally, install the support tube (part code 5) using M8x70 (part code 9) and clip (part code 6).
- Secure the bolt connections and the places where the arch components enter one another with "grey assembling tape" (silver tape, repair tape).

Fig. 4 Assembly of canopy frame
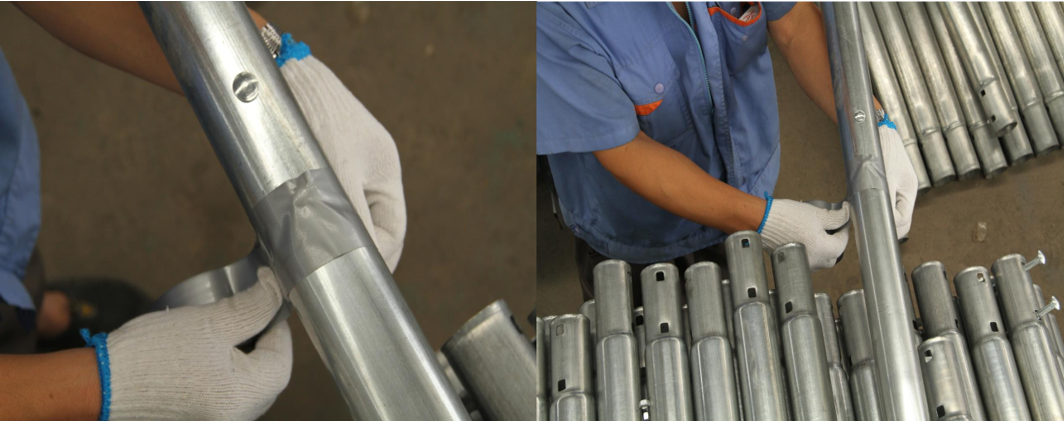
Fig. 5 Securing the joints with repair tape
ASSEMBLING THE ROOF COVERING
- For the installation of the roof tarpaulin you need a couple of people and a hoist, e.g. a telescopic hoist. Remember that if you are installing the roof covering in winter, it should be warmed up by a minimum of 10C. 10C.
- Insert the lower tension tube (No. 16) into the lower pockets of the tarpaulin. Tie a rope to the tarpaulin tension tube, then throw the rope over the tent frame and pull the tarpaulin over the tent frame (fig.7). Note: Pull the tarpaulin over the frame evenly, carefully and slowly. Do not install the tarpaulin over the frame in high wind conditions. Before pulling the tarpaulin, check that the tube connections of the roof structure are well sealed with repair tape (fig.5).
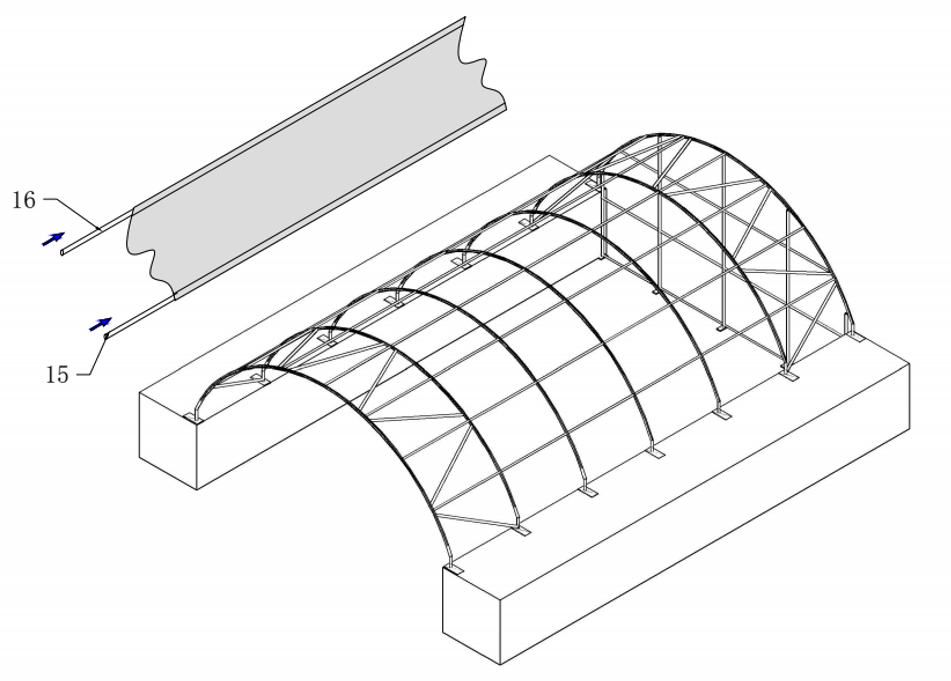
Fig. 6 Installation of the curtain
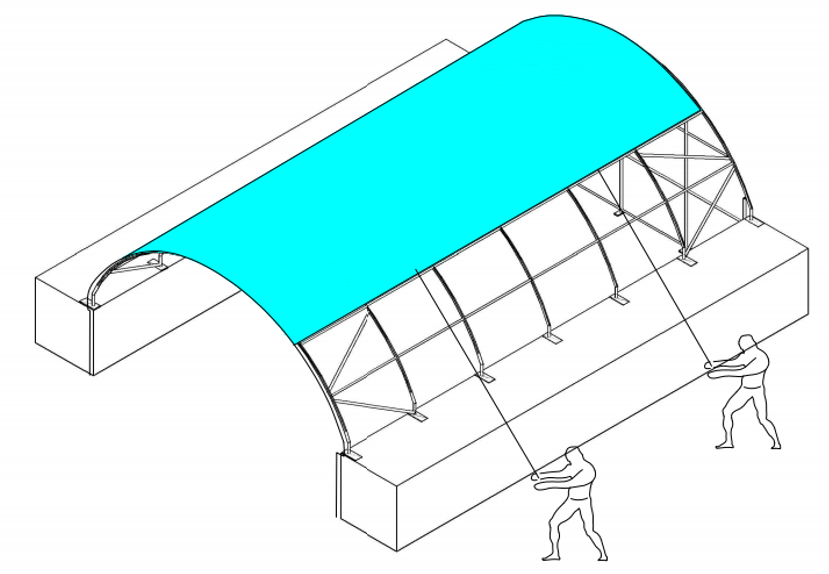
Fig. 7 Stretching the curtain - Use ropes to staple the tarpaulin to the two side bows, finally tie the tarpaulin to the mounting plate and pipes (No. 17).
- Then cut the fabric of the tarpaulin over the pipe to the width of the transport straps in the pocket of the tensioning pipe at the tensioning devices for the transport straps (No. 10) Then drape the transport strap around the pipe tensioning the tarpaulin as shown in Fig. 3. Tighten the transport straps evenly so that the tarpaulin sits evenly on the roof structure. Finally install the cap (part code 15) on the lower tensioning pipes. Finally, tie the roof covering and tension tubes together using rope as shown in the picture above.