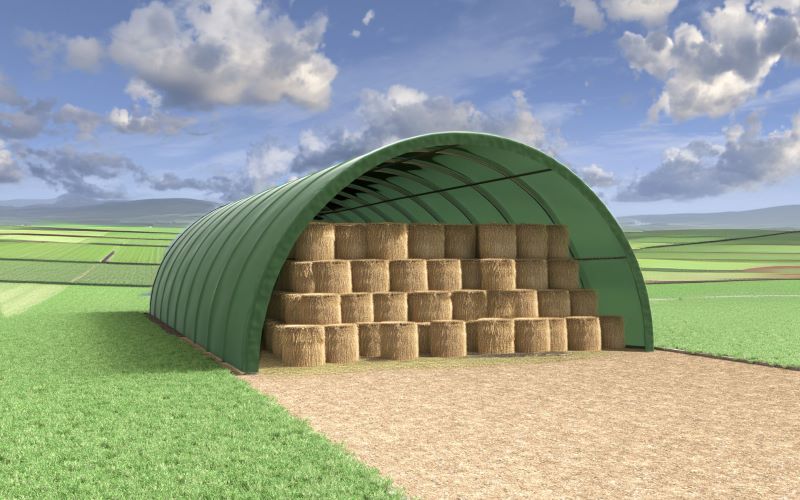
Model GS40XX21R
Width W 12.2m, height H 6.4m
Maximum wind load is 80 km/h
Maximum snow load is 0.28 kPa
|
Models:
|
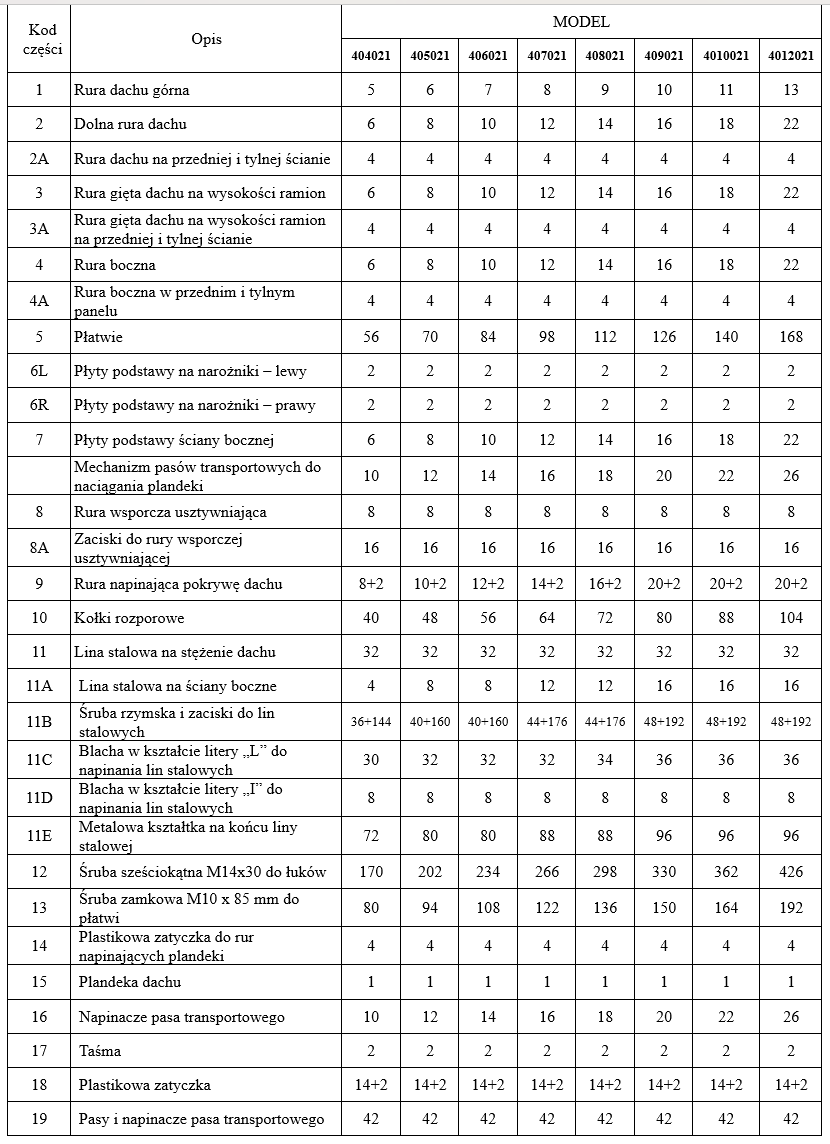
LIST OF PARTS
IMPORTANT----- READ THE INSTRUCTIONS FIRST
Improper site preparation, installation and maintenance may invalidate the warranty and cause an unnecessary and costly error. If you have any questions, please contact us by phone +48604108143 email kontakt@inamiot.pl
For easy assembly, we have identified each individual component with the part code indicated in the parts list. Familiarise yourself with the part code numbers and drawing to ensure trouble-free assembly.
Very helpful video on tent hall assembly
1. Check the contents of the shipment when you open the transport box. Make sure all the tent hall components are in the crate.
2. Do not set up the festival marquee in strong winds, in marshy areas or on unstable ground. Check the weather forecast.
3. The marquee hall should be erected on a firm level base. The tolerance for deviations in dimensions is +/- 1 cm. It is recommended to make concrete pours for the mounting columns with dimensions of 50x50x80 cm with a reinforcement rod fi 10 mm 4x10 mm stirrup fi 6 every 20. It is not allowed to base the structure directly on unconsolidated and unstabilised ground, on loosened and loose soil with compaction indices below Id<0.6.
4. Ground anchors should be driven full length into the ground in such a way that they cannot be accidentally pulled out. Anchors should be driven into the ground at an angle.
5. Check local regulations and plan the location of the installation in such a way that the required distance from electrical, gas, water and other cables is maintained.
6. Pay attention to the direction of the screw. Do not install the bolts on top of the structural frame of the tent where the fabric will rest, as you will damage the fabric.
7. Cover all pipe joints and wire ends with repair tape (silver tape) to secure the canopy. Use the shims provided between the tent structure and the canopy.
8. Work in accordance with health and safety requirements. Take care not to cut your fingers with clamps and tubes during assembly. Assemble with protective gloves, work boots etc.
9. Ensure that you have access to the marquee hall from all sides during assembly so that you can manoeuvre with a forklift, telescopic loader, hoist etc .
10. All work should be carried out by professionally qualified persons.
11. Keep the work area clean.
12. Do not use sharp tools in contact with the curtain.
13. If you are fitting the curtain in winter, the curtain itself must be stored in a room with a temperature of at least + 10 C or higher 2 days before fitting. must be unfolded at this temperature. Otherwise cracks or fractures may appear in the curtain.
14. The marquee may only be assembled from the components supplied. It is not permitted to alter the components of the marquee hall. It is not permitted to alter, change etc. the components of the marquee hall. Any changes to the components, substitutions of components will void the guarantee.
15. Snow must be removed immediately. Accumulating snow may cause excessive strain on the structure, resulting in damage.
16. No additional loads may be attached to the tent structure. The structure is only rated for snow load, wind load and its own weight.
17. The lower parts of the tarpaulin, below the tarpaulin tension tube, must remain loose. They must not be pressed down or fixed permanently, as this is where air pressure escapes from the tent in the event of gusts of wind.
EQUIPMENT AND TOOLS NEEDED FOR INSTALLATION
1. Measurement tape
2. Repair tape (sliver tape)
3. Chalk(marker)
4. Level
5. Screw spanners.
6. Stepladder
7. Hammer
8. Knife, scissors.
9. Power tools
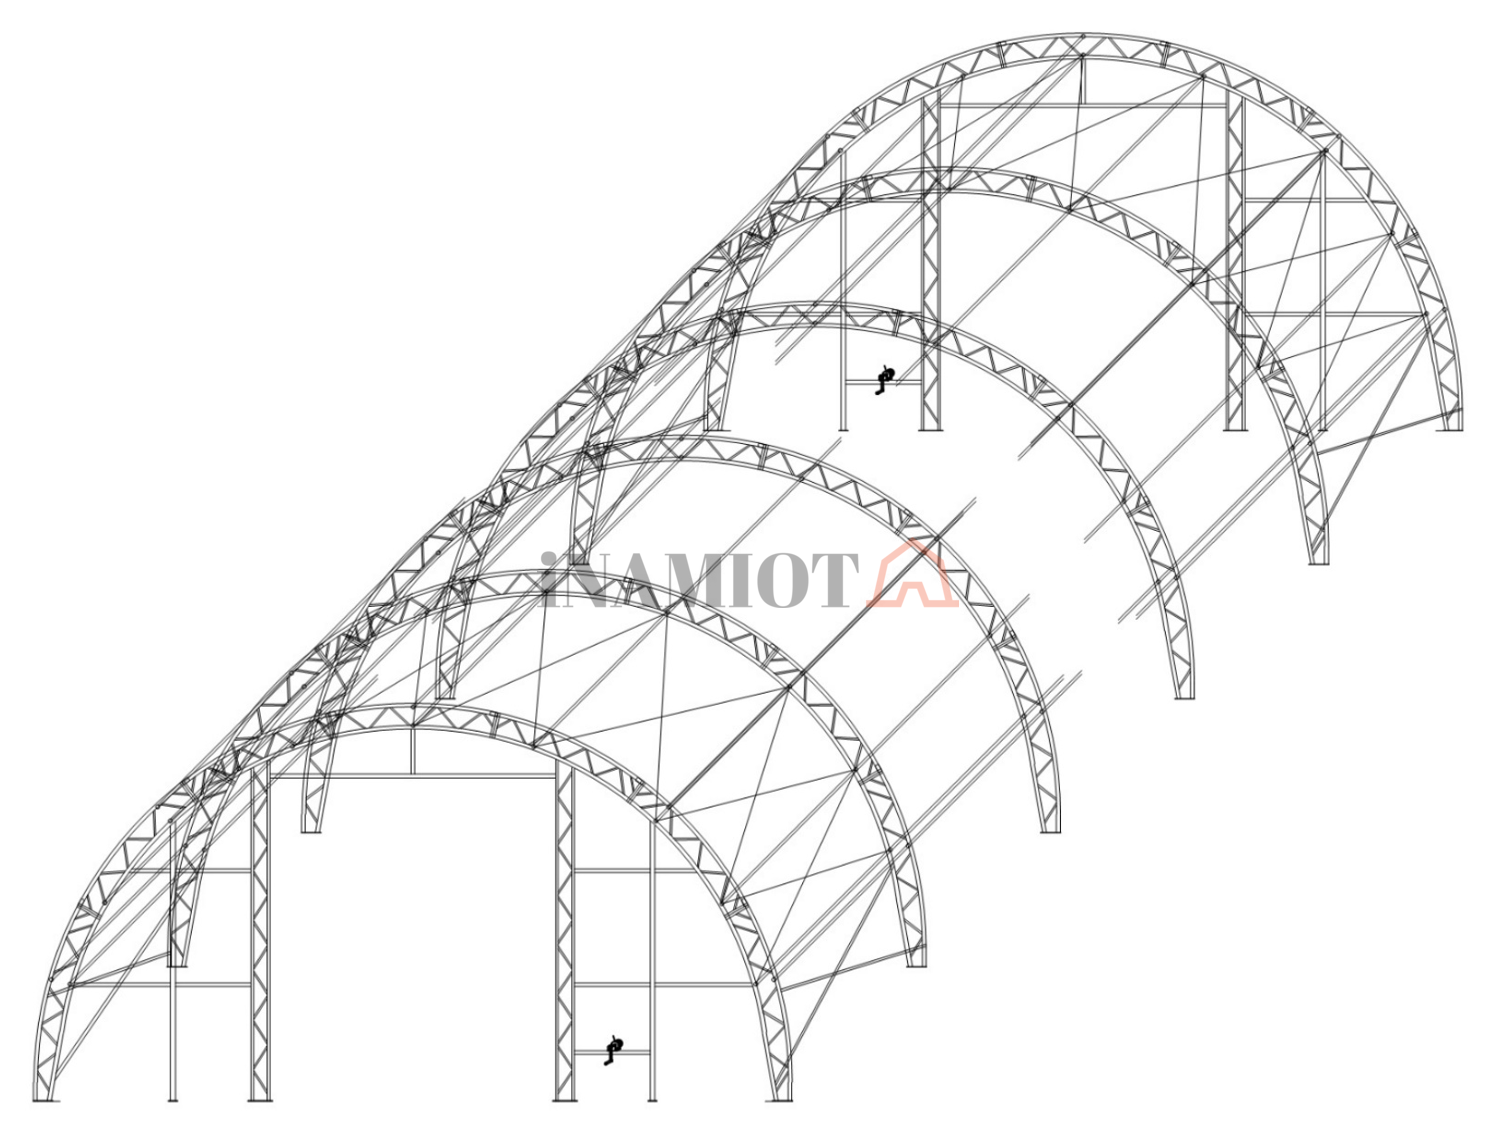
Fig. 1 Frame structure with back and front wall
INSTALLATION PROCESS
INSTALLATION OF BASE PLATES
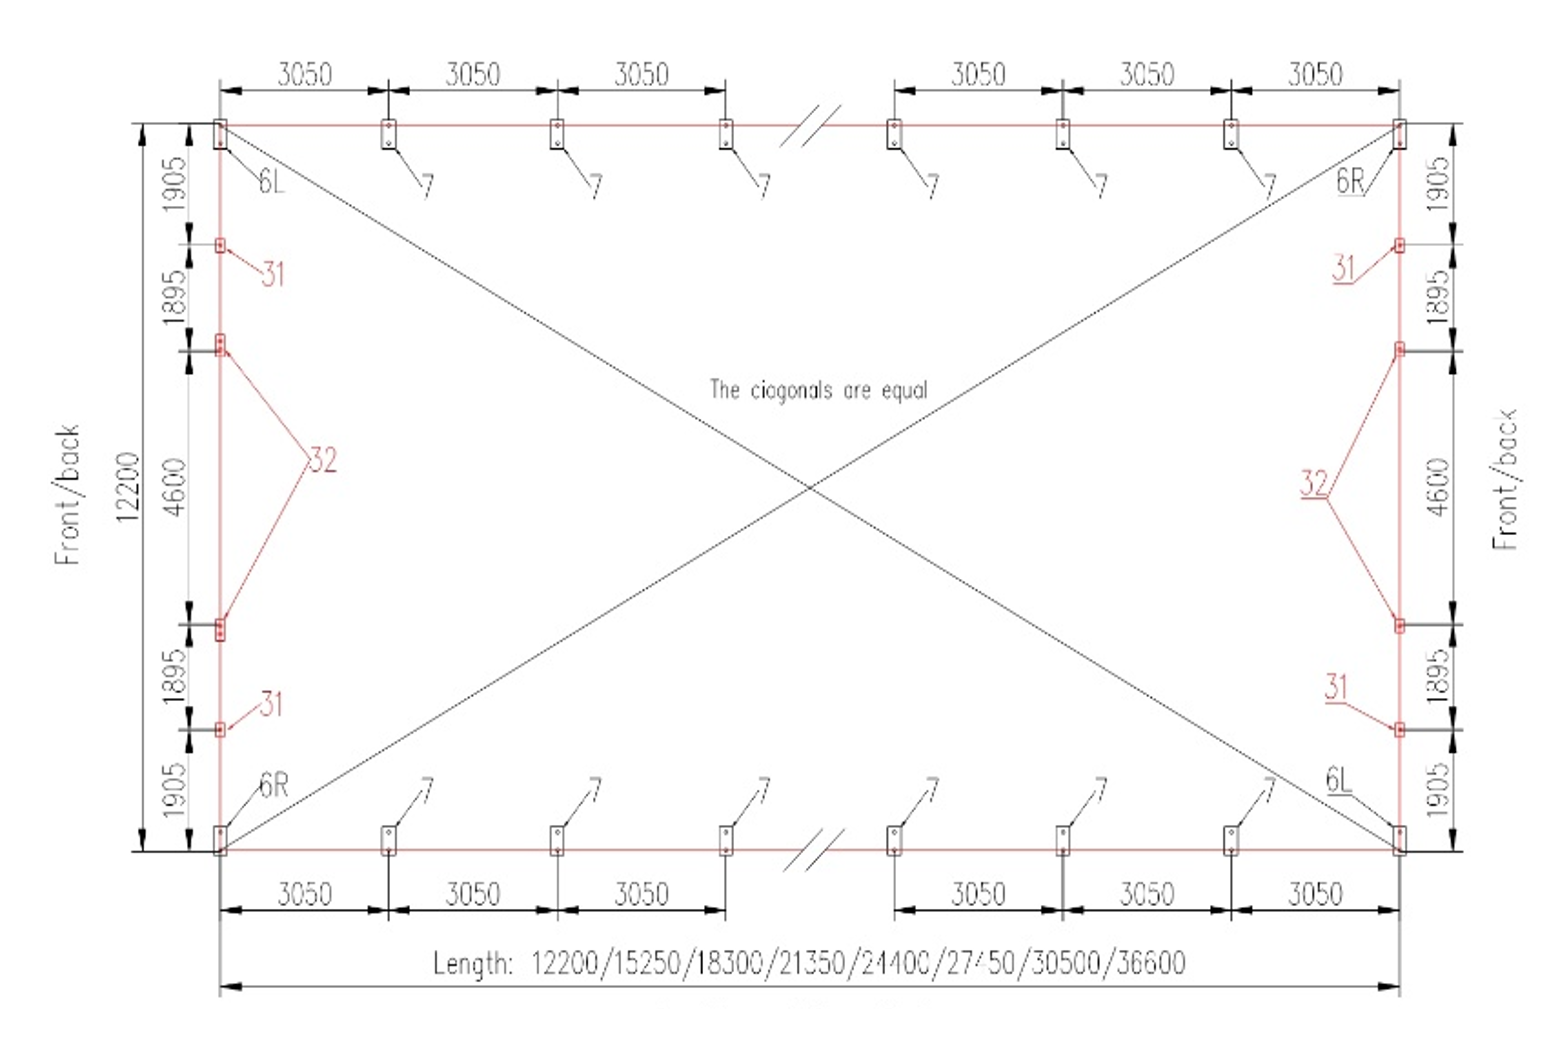
Fig. 2 Positioning of the base plates
1. Please refer to the drawing to position the base plates (No. 6L, 6R, 7). Ensure that the base plates are installed parallel to each other and at right angles to the opposite base plates.
2. When installing on the ground, fix the base plates with the dowels provided in the kit (No. 10). The pins are driven at an angle to the ground.
3. When mounting the storage tent on paved ground, use the pegs. The pegs should be adapted to the ground on which the tent is mounted.
4. Base plates 31 and 32 are included in the front and rear wall kit.
FRAME INSTALLATION
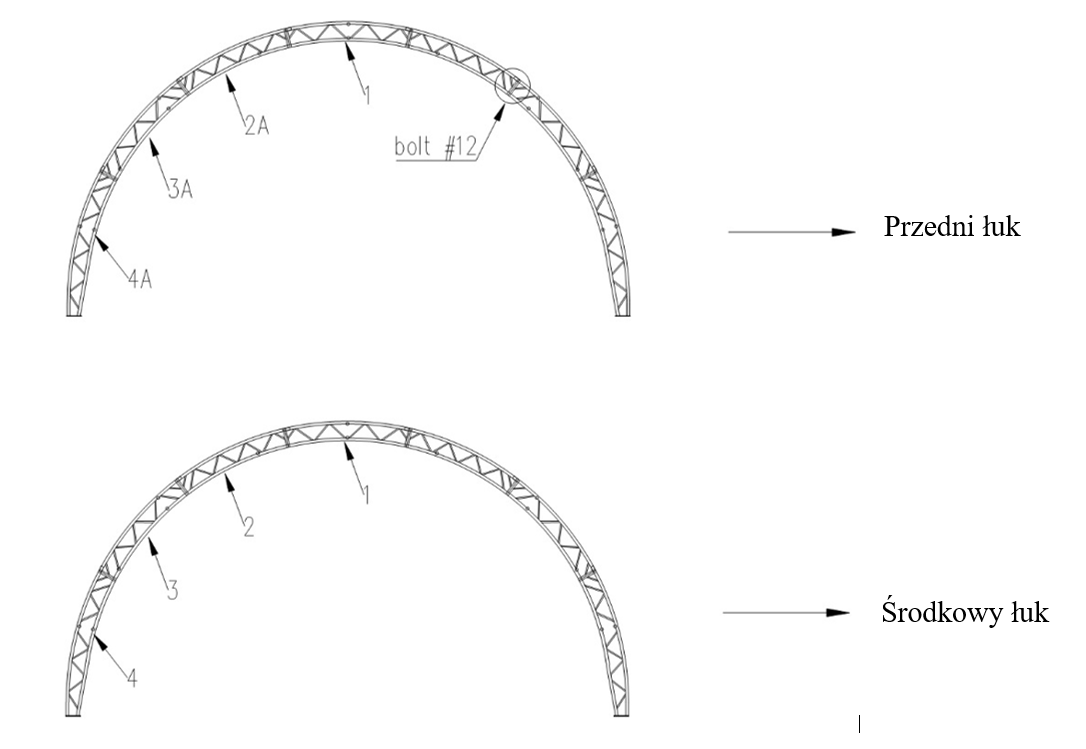
Fig. 3 Installation of the front and centre frame
5. Find 1 pcs. upper roof tube (nr. 1), 2 pcs. lower roof tubes (nr. 2, 2A), 2 pcs. bended roof tube at shoulder height, (nr. 3, 3A), 2 pcs. side tubes at the base of the arch, (nr. 4, 4A)
6. Assemble the first arch as shown in the picture above.Connect the components listed above using M14x30 bolts (no. 12).
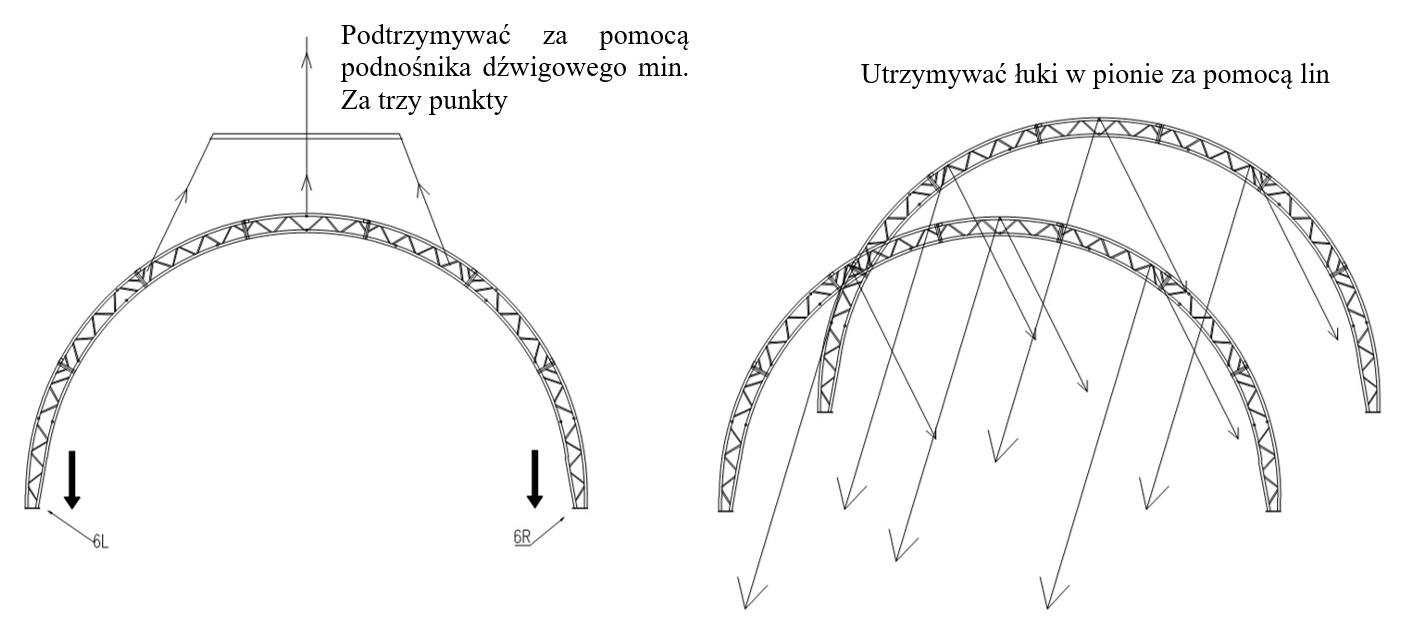
Fig. 4 Embedding of the frame arches.
7. Slowly lift the first arch with a crane (lift at least three points). Place the first/front arch on the corner base plates #6L and #6R. Connect with screws. At the same time, support the arch with ropes, crane, etc. to make sure the arch stands stable. After erecting the front arch, erect the first inner arch in the same way. Note: pay attention to stability during this process.
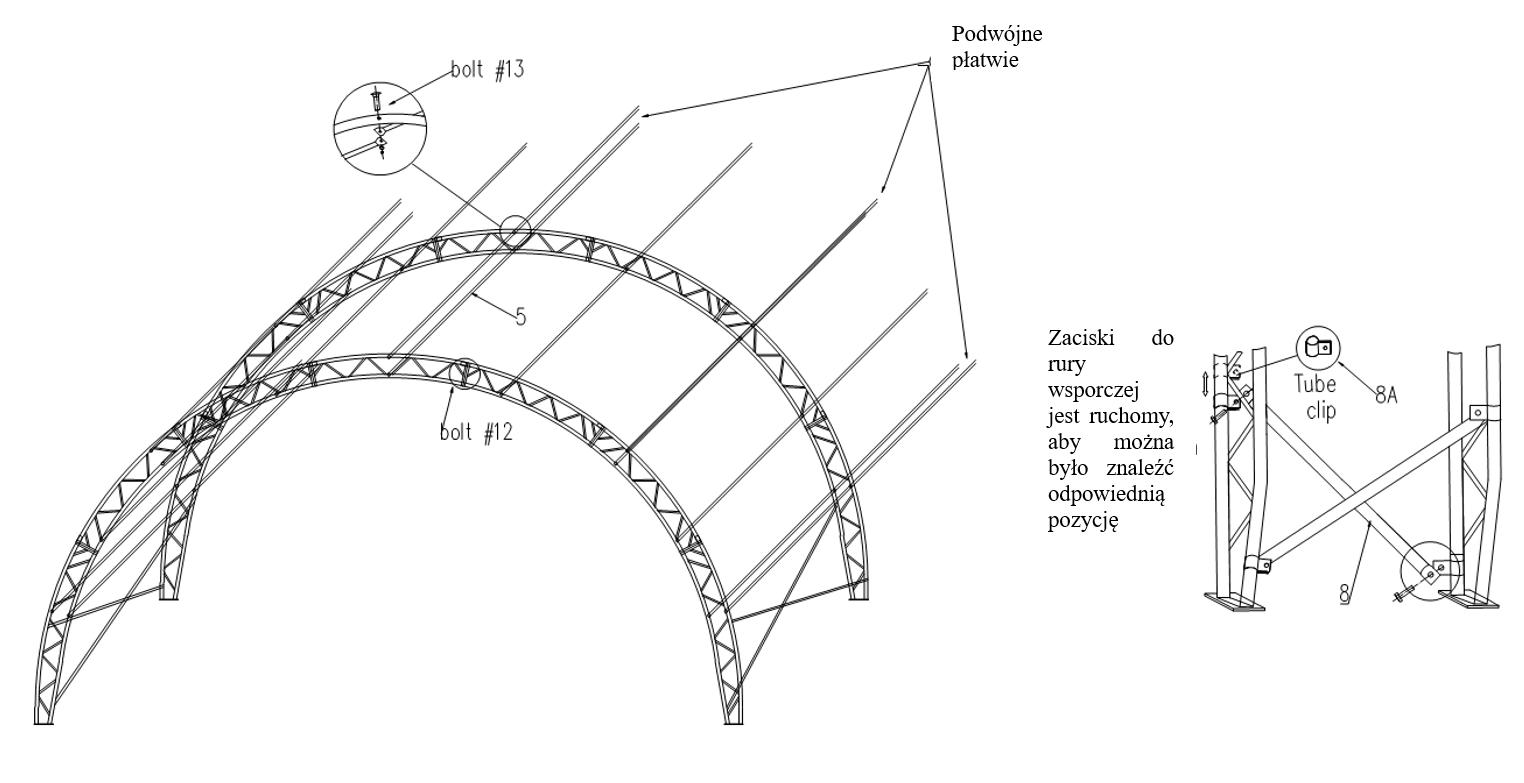
Fig.5 Assembly of the purlins
8. Connect the first and the first inner arch immediately with the purlins (no.5) using M10*85 mm screws (no.13) .
9. Mount the brace support tube (No. 8). to prevent the frame from tilting.
10. Install the remaining arches of the hall.
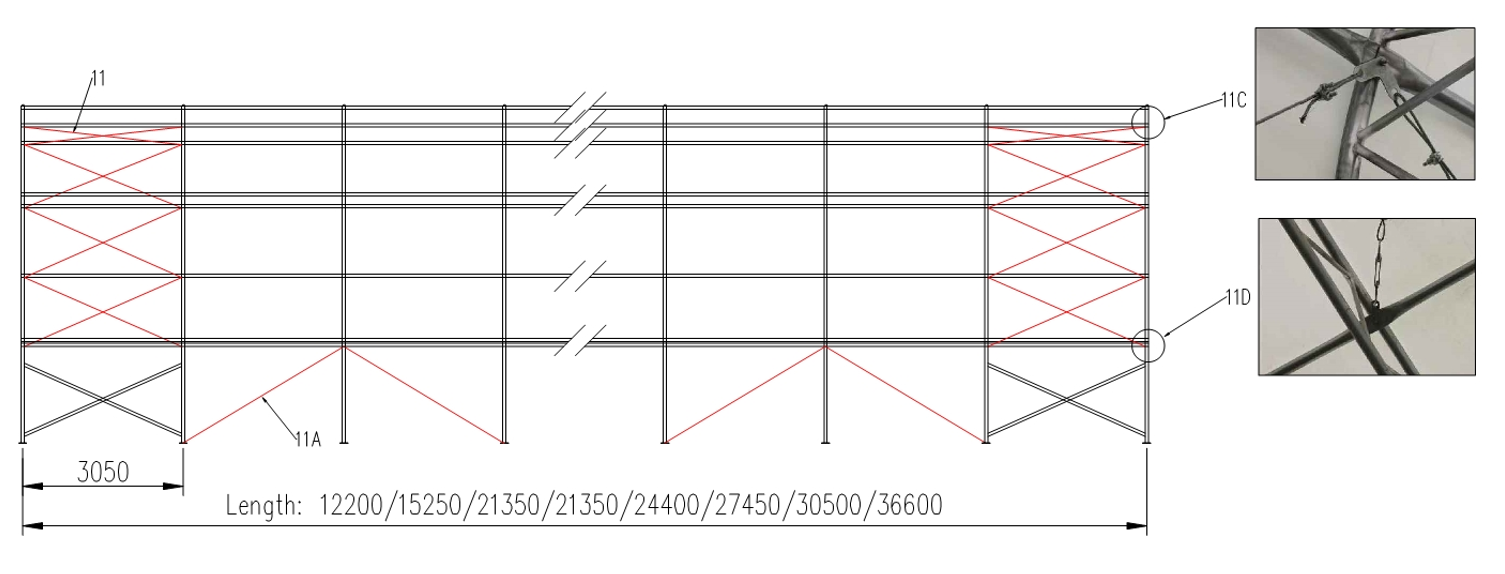
Fig.6 Installation of roof and side wall bracing.
11. Install the roof and side wall bracing (steel cables, No. 11 11A) according to the above drawing. Once all the bracing cables have been installed, lightly tighten the turnbuckles to adjust the arches vertically and increase their rigidity.
12. Wrap the joints of the arches with repair tape (silver tape).
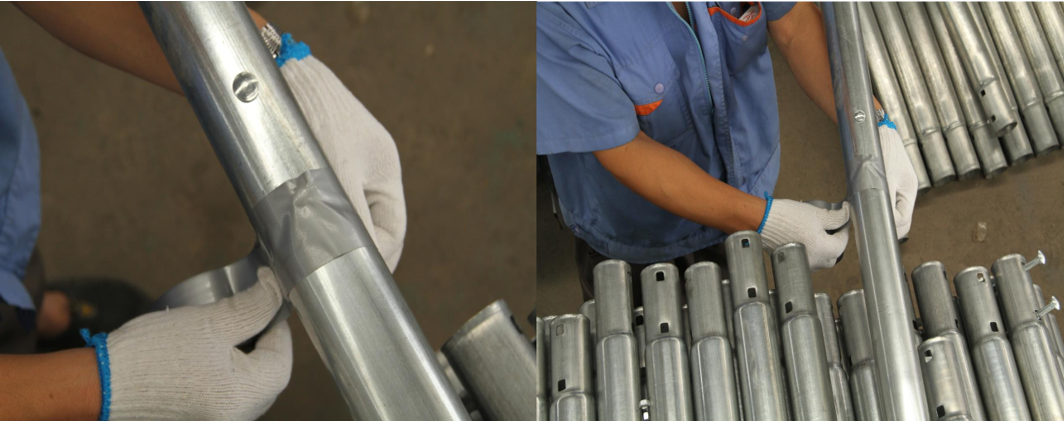
Fig.7 Securing the joints with repair tape.
ASSEMBLY OF ROOF COVERING
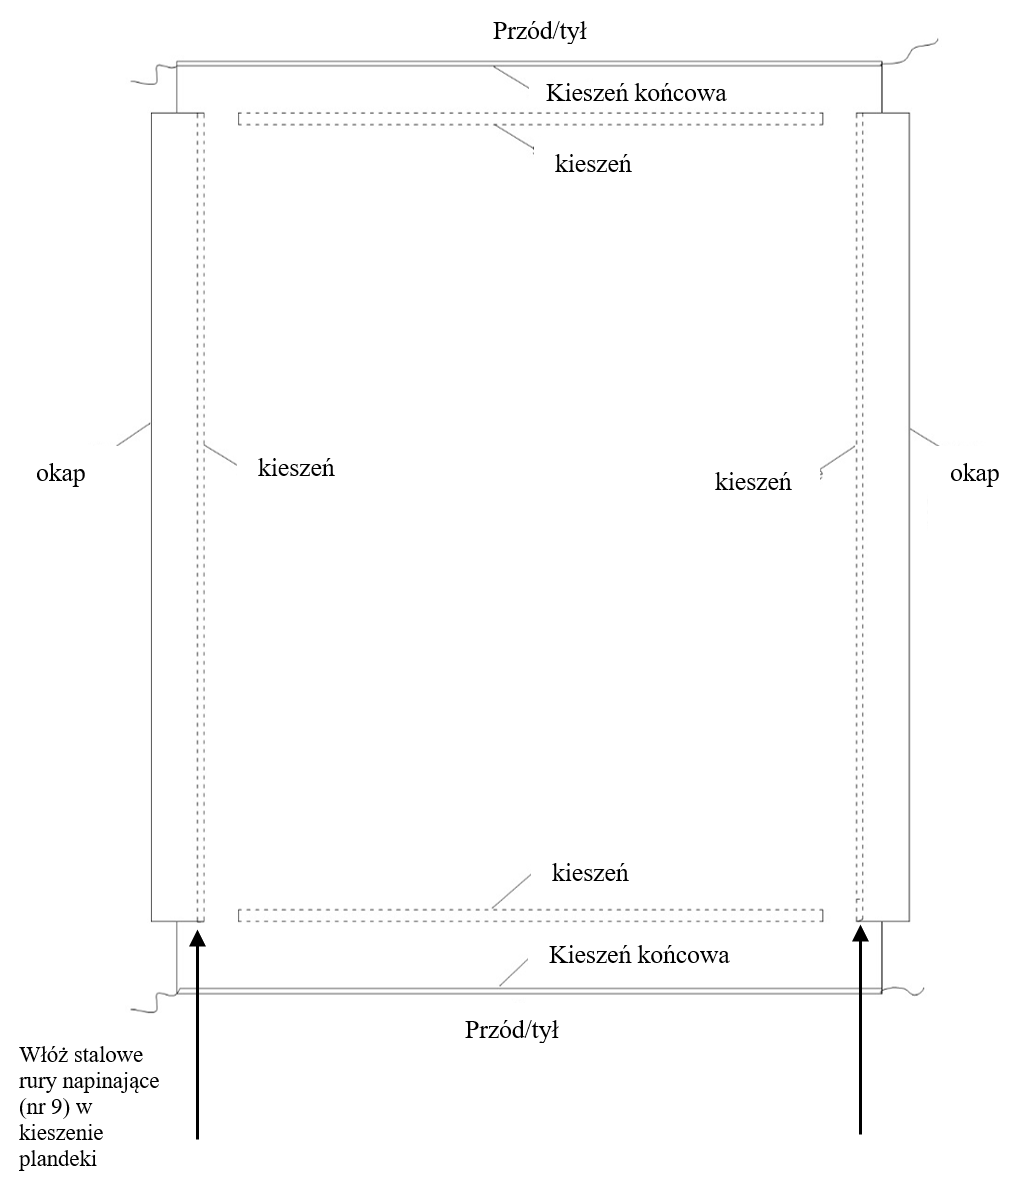
Fig.8 Roof covering
13. For the installation of the roof tarpaulin you need a couple of people and a hoist, e.g. a telescopic hoist. Remember that if you are fitting the roof covering in the winter, it should be warmed up by a minimum of 10C. 10C. Do not install the curtain on the frame in strong wind conditions. Before tensioning the curtain, check that the pipe joints are well taped with repair tape (silver tape).

Fig. 9 Stretching the curtain
14. Fold down the roof tarpaulin on one side of the tent. Insert the steel tubes into the pockets of the tarpaulin. Cut small holes in the pockets with the tubes and tie the ropes at this point. Make cuts every 3 m or so. Position one man to one rope. Throw the rope over the tent frame and pull the tarpaulin over the tent frame.
Note: pull the tarpaulin over the frame evenly, carefully and slowly. One person should be inside and watch that the tarpaulin does not catch on the tent structure. If necessary, lift the tarpaulin. After pulling the tarpaulin, tie it to the structure at the corners.
15. Fit the tubes in the pockets at the front and back of the tarpaulin (parts 40-40D). Align the tarpaulin front/rear, then left/right. Pull the tarpaulin front/rear. Pull the tarpaulin left/right.
